Wednesday, February 10, 2010

Wordless Wednesday: Valentine's Day mug cozy

Doesn't this mug cozy make you feel warm and fuzzy inside? Using a simple stranded knitting (also known as Fair Isle knitting) pattern makes this mug cozy even thicker and warmer. It is a small project and uses worsted weight yarn and US 8 needles, so even those of us new to stranded knitting should be able to finish this for our loved ones by Valentine's Day!

Click here for the designer's website, the story behind the cozy, info on the yarn and on Fair Isle/stranded knitting. For the free pattern, look for the link in between the two cozy pictures on her site (Classic Elite Yarns).
Monday, February 8, 2010

Intarsia knitting

I have successfully completed the top moss-stitch border on Ginny's afghan and have begun intarsia knitting the main blanket. Intarsia knitting is a method for knitting with 2+ colors where you can introduce a large solid block or shape of color in the middle of another color. I am using it to create a simple quilt block look. There isn't much to it... just make sure the color of yarn you are finishing ends up on top so the new color can go around it and lock it in place, then drop the old color and continue with the new one. Simple! All the color changes end up on the backside of your work, so it looks seamless and beautiful on the front. The tricky part is keeping all those different colors separated!

This first row of intarsia knitting on my afghan has a white moss stitch border, a square of white, a square of watermelon (raspberry pink), a square of white, a square of blue mint (turquoise), and another white border. All told, five skeins of yarn going at once! Normally, intarsia knitting is done with smaller patterns where you can trail a couple of yards of yarn behind the work or create small "bobbins" by winding up a section of yarn so it pulls from the center (see photo below). Unfortunately, since each block of my blanket will require nearly a whole skein, there is no way to get around working with so many full skeins at once. The main hang up I am having now is having to untwist all of them from each other at the end of a few rows! But I am enjoying the color changes, the new technique, and seeing the project slowly take shape. Blanket progress: 5 inches down, 55 inches to go! Oy.

Here is an excellent video on intarsia knitting, shown in both Continental and English styles: http://www.knittinghelp.com/videos/advanced-techniques Scroll about 2/3 of the way down to "How to knit with 2 colors at a time" and intarsia knitting is the second technique.

Here is my blanket front where the intarsia looks seamless. (And my yarn is getting tangled!)


And here is the backside with the strands twisted around each other at each color change.

I realize my yarn is in a maternity clothes shopping bag, but I am not making any subtle announcements! It was just left over from a baby shower and a handy size. :)

Saturday, February 6, 2010

Adventures in cable knitting

Up until recently I have been a rather timid knitter. I was content to knit and purl on straight needles and stuck to single-color patterns that required as few increases and decreases as possible, and preferably on nothing smaller than US 6 needles. I finally decided last month that, since I have been knitting off and on for the last five years, it is time to move on to some more advanced techniques.

My first major discovery was ravelry.com
! Yes, a majority of the patterns they list are not free, but there are so many that it doesn't matter! Excellent, cute, creative, impressive, stunning, and unique free patterns abound even if they are not the majority! One morning I casually browsed through patterns I ended up with ten saved that I "had to make," so it's plenty to keep even the most skilled knitter busy for years! I picked one called "Tillamook Cabled Hat" by Rilana Knits mostly because I loved the look and second, because I love the Pacific Northwest and Tillamook cheese, so the title made me happy!

My first challenge: learning a cable cast-on. This site was extremely useful, with videos for both Continental- and English-style knitting. The cast-on itself wasn't hard at all... so why, you might ask, was I struggling and grumbling and hurling curses for three hours straight trying to cast-on a silly hat??? I'll blame that on my double-pointed needles. I had never previously used DPNs, but friends had assured me that they are harmless good fun and nothing to be scared of. Now surely a somewhat experienced (and timid) knitter like myself would be able to tackle them without a sweat, but apparently DPNs, cable cast-ons and myself do not work well together. Maybe the relationship just needs some work. In any case, at long last, I was fully cast-on and ready to start knitting-in-the-round.

After the cast-on, DPN's became increasingly less aggravating with each row, and by the time my 1 1/2 inches of hat ribbing was complete I started to pick up pace. After conquering those two hurdles, the challenge I had originally been scared to face, cabling, was a piece of cake. It was an "....oh, that's it?" moment in knitting for me. My progress so far is in the picture at the top of this post.

So take it from me, if you can knit and purl, don't be afraid of cabling! But you can go ahead and be afraid of your needles. After all, there's ten pointy ends to watch out for in a pack of DPNs. That's a lot of points.

Thursday, February 4, 2010

Meet Kendra

I just love this little doll! Kendra is 12" tall, has chocolate brown skin, espresso brown hair, black eyes, and rosy cheeks. I adore the print on her skirt... in fact, it is made from a remnant of fabric left over from an outfit I made for my own daughter's "baby." It is light pink with small doodles of hearts, flowers, four-leaf clovers, and bugs, and is covered with cursive-writing words like "play," "dance," "believe," etc.

My favorite thing about Kendra's outfit is her hand-knit cotton tank top. I came up with the pattern for it specifically for this doll and it turned out so cute! It has a small band of ribbing on the bottom, stocking stitch on the body, and garter stitch on the straps. It buttons in the back for easy removal and looks so cute even without the layering shirt! I can see myself making lots of these tanks for summer dolls.

Visit my Etsy shop!

Wednesday, February 3, 2010

Wordless Wednesday: Amigurami

Come visit Stitch and Stuff on Wednesdays for a some amazing and inspiring craft ideas! I will post photos and links to projects that I think look fun and creative, but I haven't tried yet!

This week: Amigurami! In other words, tightly crocheted or knitted stuffed animals and toys, often with oversized heads.

An adorable little (and easy!) amigurami gnome!

Link to the pattern and blog


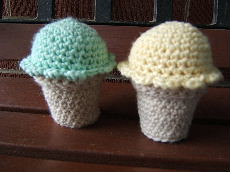
Easy ice cream cones! These ones contain small plastic cups for rigidity plus stuffing. Link to blog and pattern


One of those oversized heads I was talking about: an adorable bear named Zequi! Link to the pattern and blog


Amazing (and difficult) dragon pattern!

Tuesday, February 2, 2010

Forget Bisquick


I have been baking all my life, but I didn't realize until last year that Bisquick isn't required for tasty, fluffy, and easy pancakes and waffles! We were looking to save money on our grocery bill and didn't feel like paying $4.50 for another box of Bisquick, so my husband went hunting for recipes and experimented with them as only a good scientist can. Within a few weeks of breakfast taste-testing, we had found ourselves a couple of great recipes!

Good Old Fashioned Pancakes (original, slightly different, from allrecipes.com)
1 1/2 cups of flour
3 1/2-4 tsp baking powder (more for fluffier pancakes)
1 tsp salt
1 tbsp sugar
1 cup warm milk, add up to 1/4 more if it's too thick
1 egg, beaten
3 tbsp melted butter

Sift together dry ingredients. Make a well in the center and pour the warm milk, egg, and melted butter inside (this helps ingredients to mix well). Mix with whisk until smooth.
Cook like you would Bisquick pancakes: a little cooking spray or oil if needed, heat the griddle to medium heat, and cook about 1/4 cup sized pancakes until brown, then flip.

Classic Waffles (original, slightly different, from allrecipes.com)
2 cups flour
1 tsp salt
4 tsp baking powder (add to this if your waffles aren't fluffy enough)
3-4 tbsp sugar (beware, with 4 you may experience some caramelizing and sticking)
2 eggs, beaten
1 1/2 cups warm milk
1/3 cup melted butter
1 tsp vanilla extract

Pre-heat waffle iron. Sift together dry ingredients in a medium-sized bowl. Make a well in the center and pour the eggs, warm milk, melted butter, and vanilla inside. Mix with whisk until smooth. Ladel batter into pre-heated waffle iron and cook until golden brown.

Enjoy!

Monday, February 1, 2010

A quick peek into my workshop

While I prefer making one doll beginning-to-end, more often than not I find myself making dolls in batches to save time. The current line up is planned as follows:

-light-skinned 12" boy with blue eyes and brown hair, probably a little country boy or cowboy with overalls and a straw hat

-light-skinned 12" Asian girl with kimono or similar clothes

-tan-skinned 15" cowgirl with brown hair and eyes

-light-skinned 15" red head with green eyes and fairy wings

So look for them in the next few weeks in my shop! Of course, they might change slightly as I go, but that's the current plan!

I'm simultaneously making a 17 1/2 - 18 inch doll for my daughter's birthday next month. I have never made one quite this large and am having fun putting her together!

Here is the line-up getting their legs sewn on:
All of my dolls come with their bodies and heads reinforced with a second layer of high-quality 100% cotton interlock, hence the white fabric on top... it will layer their insides when flipped properly.

So there you have it... a small peek into my doll-making world!

My Etsy Store